
A summary for those that haven’t been keeping up with this series:
I found a number of 5.25″ disks at a thrift store a number of years ago. I finally got around to acquiring a 5.25″ disk drive and extracting the contents a while back. Since then I have been posting the contents here.
Based on the contents, at least some of these disks were apparently once owned by someone named Connie who used to run the “Close Encounters” Special Interest Group (SIG) on Delphi in the mid 1980s.
A specific definition of this SIG was found in a document on one of the disks: “This SIG, known as ‘Close Encounters’, is a forum for the discussion of relationships that develop via computer services like the Source, CompuServe, and Delphi. Our primary emphasis is on the sexual aspects of those relationships.”
This service was text based and was accessed via whatever terminal program you used on your computer to dial in to Delphi’s servers. Many of these disks have forum messages, e-mails and chat session logs. All of this is pre-internet stuff and I don’t know if there are any archives in existence today of what was on Delphi in the 1980s. In any case, much of this stuff would have been private at the time and probably wouldn’t be in such archives even if they existed.


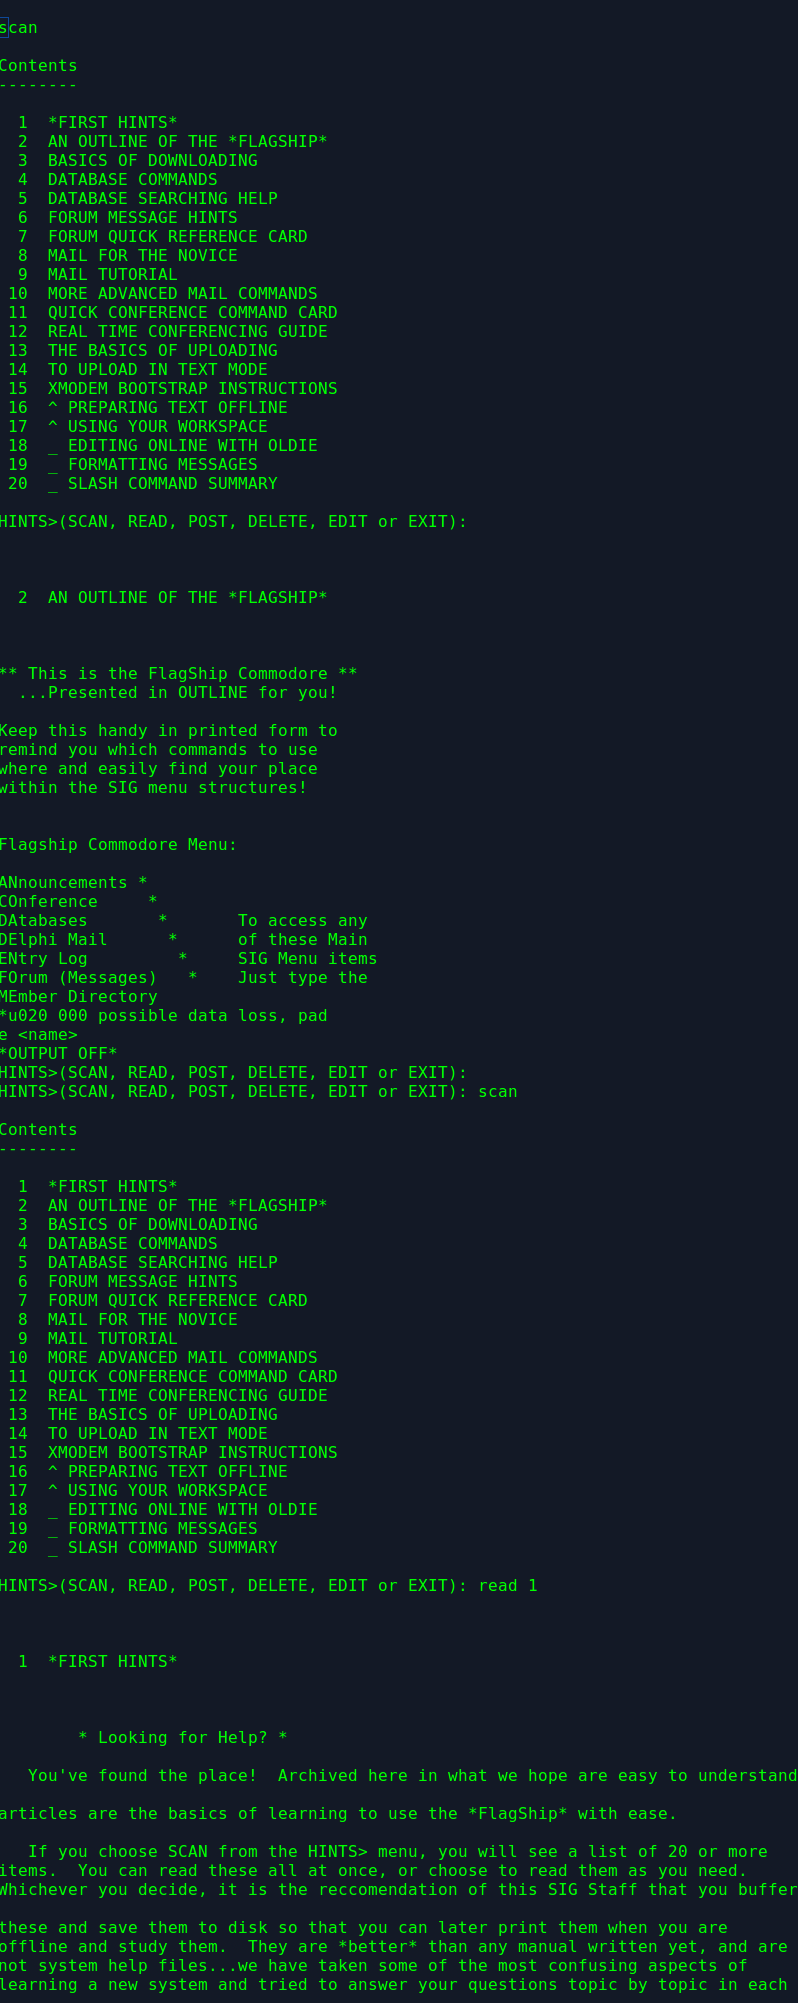
This post includes the contents of NEWHELP.DOC dated October 20th, 1985. It appears to be a log capture from the terminal of a user navigating through the various menus and help files in the FlagShip Commodore SIG. Much of the help files shown here would apply to Delphi in general so this gives you a pretty good snapshot of what it was like to use and navigate Delphi back in the mid 1980s.
See the previous post here.
===
NEWHELP.DOC
===
scan
Contents
--------
1 *FIRST HINTS*
2 AN OUTLINE OF THE *FLAGSHIP*
3 BASICS OF DOWNLOADING
4 DATABASE COMMANDS
5 DATABASE SEARCHING HELP
6 FORUM MESSAGE HINTS
7 FORUM QUICK REFERENCE CARD
8 MAIL FOR THE NOVICE
9 MAIL TUTORIAL
10 MORE ADVANCED MAIL COMMANDS
11 QUICK CONFERENCE COMMAND CARD
12 REAL TIME CONFERENCING GUIDE
13 THE BASICS OF UPLOADING
14 TO UPLOAD IN TEXT MODE
15 XMODEM BOOTSTRAP INSTRUCTIONS
16 ^ PREPARING TEXT OFFLINE
17 ^ USING YOUR WORKSPACE
18 _ EDITING ONLINE WITH OLDIE
19 _ FORMATTING MESSAGES
20 _ SLASH COMMAND SUMMARY
HINTS>(SCAN, READ, POST, DELETE, EDIT or EXIT):
2 AN OUTLINE OF THE *FLAGSHIP*
** This is the FlagShip Commodore **
...Presented in OUTLINE for you!
Keep this handy in printed form to
remind you which commands to use
where and easily find your place
within the SIG menu structures!
Flagship Commodore Menu:
ANnouncements *
COnference *
DAtabases * To access any
DElphi Mail * of these Main
ENtry Log * SIG Menu items
FOrum (Messages) * Just type the
MEmber Directory
*u020 000 possible data loss, pad
e <name>
*OUTPUT OFF*
HINTS>(SCAN, READ, POST, DELETE, EDIT or EXIT):
HINTS>(SCAN, READ, POST, DELETE, EDIT or EXIT): scan
Contents
--------
1 *FIRST HINTS*
2 AN OUTLINE OF THE *FLAGSHIP*
3 BASICS OF DOWNLOADING
4 DATABASE COMMANDS
5 DATABASE SEARCHING HELP
6 FORUM MESSAGE HINTS
7 FORUM QUICK REFERENCE CARD
8 MAIL FOR THE NOVICE
9 MAIL TUTORIAL
10 MORE ADVANCED MAIL COMMANDS
11 QUICK CONFERENCE COMMAND CARD
12 REAL TIME CONFERENCING GUIDE
13 THE BASICS OF UPLOADING
14 TO UPLOAD IN TEXT MODE
15 XMODEM BOOTSTRAP INSTRUCTIONS
16 ^ PREPARING TEXT OFFLINE
17 ^ USING YOUR WORKSPACE
18 _ EDITING ONLINE WITH OLDIE
19 _ FORMATTING MESSAGES
20 _ SLASH COMMAND SUMMARY
HINTS>(SCAN, READ, POST, DELETE, EDIT or EXIT): read 1
1 *FIRST HINTS*
* Looking for Help? *
You've found the place! Archived here in what we hope are easy to understand
articles are the basics of learning to use the *FlagShip* with ease.
If you choose SCAN from the HINTS> menu, you will see a list of 20 or more
items. You can read these all at once, or choose to read them as you need.
Whichever you decide, it is the reccomendation of this SIG Staff that you buffer
these and save them to disk so that you can later print them when you are
offline and study them. They are *better* than any manual written yet, and are
not system help files...we have taken some of the most confusing aspects of
learning a new system and tried to answer your questions topic by topic in each
article.
If you need any further clarification of these things, please bring them to
the immediate attention of the SIG manager, deb!
Open your buffer....and start reading ! Pressing <return> at each pause for
the menu will bring the NEXT hint article to you. You don't need to SCAN for
and specify each different topic number unless you don't want to read all of the
help files now. Those marked "QUICK" are small command reference summaries for
you. The others will be longer and detailed articles.
HINTS>(SCAN, READ, POST, DELETE, EDIT or EXIT):
2 AN OUTLINE OF THE *FLAGSHIP*
** This is the FlagShip Commodore **
...Presented in OUTLINE for you!
Keep this handy in printed form to
remind you which commands to use
where and easily find your place
within the SIG menu structures!
Flagship Commodore Menu:
ANnouncements *
COnference *
DAtabases * To access any
DElphi Mail * of these Main
ENtry Log * SIG Menu items
FOrum (Messages) * Just type the
MEmber Directory * first two
POll * letters of the
TOpics Available * selection and
WHo's On * Press <return>
SEt Defaults * at SHIP>
HElp *
EXit *
1. ANNOUNCEMENTS
SHIP>What do you want to do? ann
Announcements Menu:
Conference News
Database Update
Membership Notice
User Board
What's New
Shopping News
Main Banner
Exit
Each Announcements Area offers you
the following commands:
What's New
13 announcements available.
What's New Menu:
SCAN Table of Contents
READ Item(s)
HELP With Commands
EXIT To Previous Menu
NEXT Item
BACK To Previous Item
2. CONFERENCE
SHIP>What do you want to do? co
Conference Menu:
WHO (list groups)
PAGE a user
JOIN a group
NAME nickname
EXIT
Within any group on Conference,
you can use any of the following
Immediate Commands:
/Answer
/Bye
/Cancel
/Exit
/Gname <name>
/Help
/Join <group>
/Mail
/Name <nickname>
/Page <user>
/Reject
/Repeat
/Rname
/Send <name-list> <msg>
/Squelch <name>
/Talk <group>
/Time
/Who
/Whois <name>
For more specific information about
using these commands, read the
COnference HELP article by typing
HELP at the main SIG Menu.
3. DATABASES
SHIP>What do you want to do? da
DATABASES Menu:
FLAgShip Archives
SOFtware To Go
Amiga Beginnings
C-128 Software
EDUcation & Home
CP/M
GAMes
STArBoard (User Groups)
LANguages & M/L
TELecommunications
TOOlkit
B-128 National Group
Exit
Each Database Topic offers you the
following command menues:
FLAgShip Archives
FLAgShip Archives Menu:
DIR Table of Contents
READ Item(s)
READ Menu:
List
Download (data capture)
Next
XDOW
Exit
HELP With Commands
EXIT To Previous Menu
NEXT Item
SEARCH By Keyword(s)
SEARCH Menu:
EXPAND Search (OR)
NARROW Search (AND)
SELECT (To Read)
EXIT
START Search
You will find more detailed help
by typing HELP at the Main SIG menu
about XMODEM uploads, Text Uploads
XMODEM downloading and SEARCHing.
In addition, the following
commands are available to you in
your workspace:
WRITERS-CORNER Menu:
APPEND HELP
CATALOG HOME
COMMON LIST
COPY PUBLISH
CREATE PURGE
DELETE RENAME
DOWNLOAD TYPESET
EDIT UPLOAD
EXIT XDOW
DIRectory XUP
You will find more detailed help
information in the file called
WORKSPACE HELP
4. Delphi MAIL
SHIP>What do you want to do? mail
MAIL> Menu:
SEND mail to other users READ your mail
REPLY to your mail
FILE your mail
EXTRACT your mail to your workspace
FORWARD your mail
SEARCH your mail
DELETE your mail
More detailed information about the
MAIL commands can be read in the
various levels of hint articles
about using the very powerful
Delphi Mail system!
5. ENTRY LOG
SHIP>What do you want to do? en
Entry log for what username? deb
6. FORUM (Messages)
SHIP>What do you want to do? f
FORUM Menu:
ADD New Message (Thread)
READ Message(s)
REPLY To Current Message
FOLLOW Thread
DIRECTORY of Messages
MAIL
FILE Message into Workspace
FORWARD Message by Mail
DELETE Message to or from you
EDIT a Posted Message you wrote
NEXT Message
BACK Up Within Thread
TOPICS (Set/Show)
HIGH Message (Set/Show)
SEND short message to user currently on the sig.
WHO shows who is in the SIG right then.
HELP
EXIT
Please refer to detailed information
about using each of these commands
by reading the HELP articles at the
main SIG menu.
7. MEMBER DIRECTORY-Information
SHIP>What do you want to do? mem
PEOPLENET Menu:
I-AM
WHO-IS
LIST-KEYWORDS
BROWSE
SEARCH
HELP
EXIT
8. POLL
SHIP>What do you want to do? p
POLL Menu:
BROWSE through poll results
CREATE a new poll
EDIT your poll comment
HELP
LIST poll names
RESULTS with comments
VOTE on a poll
9. TOPICS AVAILABLE
SHIP>What do you want to do? top
Topic Information Available Menu:
FLAgShip Archives
SOFtware To Go
Amiga Beginnings
C-128 Software
EDUcation & Home
CP/M
GAMes
STArBoard (User Groups)
LANguages & M/L
TELecommunications
TOOlkit
B-128 National Group
Exit
Each Topics Available item then has
a menu offering reference data which
pertains to the topic with the
following commands:
EDUcation & Home
5 articles available.
EDUcation & Home Menu:
SCAN Table of Contents
READ Item(s)
HELP With Commands
EXIT To Previous Menu
NEXT Item
10.WHO'S ON
SHIP>What do you want to do? w
11.SET DEFAULTS (not functional yet)
12.HELP
8 hints available.
Helpful Hints Menu:
SCAN Table of Contents
READ Item(s)
HELP With Commands
EXIT To Previous Menu
NEXT Item
Contents (might look something
-------- like this:)
1 CONFERENCE
2 FILE EXTENSION CONVENTIONS
3 FORUM HELP
4 FORUM QUICK REFERENCE CARD
5 HOW TO SEARCH IN DATABASES
6 TEXT UPLOADING
7 XMODEM DOWNLOADING
8 XMODEM UPLOADING
HINTS>(SCAN, READ, POST, DELETE, EDIT or EXIT):
3 BASICS OF DOWNLOADING
DOWNLOADING
Delphi uses the XMODEM protocol for files downloading. Files downloaded with
XMODEM can be expected to RUN or to be READ as described in the documentation
files or file description Some software uses the term downloading to indicate
capture buffer file transfers. If your terminal software does not have XMODEM
options, it is probably this type of terminal program. Please refer to the
Hints article #15, called:
XMODEM BOOTSTRAP INSTRUCTIONS
if your terminal software does not have this protocol.
XMODEM File Transfers
=====================
1. Select DATABASES from the main SIG menu.
2. Select the appropriate DATABASE Category from the menu for the kind of file
you wish to download.
3. Select DIRectory to see the files offered.
** Note also that you can enter SEARCH here and select a subset of the files in
the database which have the keywords you are interested in, and then DIR will
work on just those-not the entire database.
4. Select the file you wish to download and enter REAd <name of file> to read
the file description. To view the most recent additions to the database, you
may enter READ with no filename and press return. This will give you the
most recently submitted file first, and continue back in reverse
chronological order thru the files.
5. Enter the command XMO at the prompt. Note that the old XDOW still works.
6. Delphi will respond with some information, and let you know when to start
downloading. Wait until Delphi tells you it is ready to receive.
** Delphi will tell you Ok, Recieve! and and then, in (parenthesis) will say
either BLOCKED or TEXT. If it says TEXT, then you proceed with a TEXT
transfer, (SEQ file), if it says BLOCKED, then you proceed with a Binary, or
PROGRAM file transfer.
7. Set your terminal for XMODEM downloading according to the documentation for
your terminal program
8. Most terminal programs ask if the Host is ready to send. Respond Yes.
9. Your terminal program may ask whether the file is SEQuential or PROgram.
Respond appropriately.
10.The process is now automatic.
11.When the file transfer is complete, your terminal software will notify you.
12.If you wish to download another file,go to step 2.
13.Use the EXit or CNTRL-Z command to exit from the database.
14.When off-line, LOAD and RUN or READ the file to make sure the procedure
worked properly.
** Note: An Xmodem block is 128 data bytes. File sizes are marked in the
Flagship database in CBM blocks which have 254 data bytes, so expect to
download about twice as many Xmodem blocks as the CBM block count would show
(ie a file that is marked here as 10 CBM disk blocks will be about 20 Xmodem
blocks).
HINTS>(SCAN, READ, POST, DELETE, EDIT or EXIT):
4 DATABASE COMMANDS
DBASE TOPIC>Which topic? FLA
FLAgShip Archives Menu:
Directory Search
Read Workspace
Set Topic Help
Submit Exit
The new Menu looks just like that! I was particularly pleased to see the
NAME of the database on the menu.
* Now, a little bit about the commands:
DIRECTORY is a listing of the filenames, the file type, date of submission
and the name of the uploader.
It will give you a quick idea of what is in the database. You'll see that files
here can have up to 32 (!) characters, and we don't have to bother with cryptic
things like:
DMNUS3.BIN
You can actually specify a meaningful and completely recognizable title to
all files!!
READ is the command that you use to start looking at the files and their
descriptions for downloading. This command, like DIR, has several ways it can
be used.
READ all by itself, will allow you to start at the top of the database. Here,
all newest files are added to the top, leaving the older files below, but still
in chronological order. Its the old LIFO order, which makes it easy to see
whats been added to the database recently.
One of the most friendly things I noticed about READ is that you can specify
to READ a FILENAME, and it will start the READ function at that file, skipping
all others in front of it. This will be a great help to anyone who is in the
middle of browsing thru the database and leaves to come back the next day. You
will actually be able to take up right where you left off!!!!!
The READ command will allow you to see the description of the file, and other
information like name of uploader, date, type of file and keywords.
DBASES:INF> (Dir, Read, Set, Exit) read
Name: *FLAGSHIP* CHRISTENING MOVIE!
Type: DATA
Date: 28-MAY-1985 03:11 by DEB
Here it Is...Just like it happened, in case you were not here to see The
Christening of the *FlagShip*
Keywords: SIG, NEW, SIG, CHARTER, MEMBERS, CHRISTENING, OPENING, FLAGSHIP
ACTION> (Next, Download, Display) ?
ACTION Menu:
Next Group/File Description
Download Help
Xmodem Download Exit
List (Unformatted)
Display
ACTION> (Next, Download, XMOdem)
This brings you to the ACTION> prompt. The ACTION> menu will *not* show
unless you press a "?" or specify MENU. The items on this menu are pretty
self-explanatory:
NEXT = go to next database entry. A <return> does the same thing. Within a
GROUP of files, a <return> will default to the next file in the GROUP,
typing NEXT will get you the next Database entry.
DOW = Text Download, buffer capture
XMO = XMODEM Download (or XDOW)
LIST = Display to screen for buffer
DISP = **Don't use this command** It will re-format the text and generally just
screws things up.
COPY = Copy file to your work area.
REP = Send Mail to Uploader - Neat Feature, eh???!
DES = View *same* file description again.
Reccommended commands for downloading:
Programs: XMO
Text: DOWNLOAD
XMO - works, but takes
longer than a buffer
capture.
The one other amazing thing about the new databases is that files which are
related, or *must* be downloaded together, can be grouped together in the same
database listing. This saves you time when you submit them, as there is only
one set of keywords, and one set of descriptions! This saves you time when you
are READing the database choices in the same manner, but most of all, you'll
always know just what other files are neccessary to a set!!!
We have gone through the existing database files and grouped those together
which required it. I know you'll be quite pleased.
You'll also notice that when its neccesary, the correct name for downloading
that file will be shown just before you enter the XMODEM downloading step! No
chance of it to scroll off your screen and get the wrong name that way.
Lets quickly look at the other commands on the new menu, and then go try it out!
!!
FLAgShip Archives Menu:
Directory Search
Read Workspace
Set Topic Help
Submit Exit
Set Topic= Change to new database topic. Actually, typing in either SET or
TOP will get you to a different topic.
SUBMIT = Submit a file you have already uploaded to your personal storage area
to the new database.
SEARCH = Search by keyword for a file, or set of files. The same excellent
SEARCH program that we've already been working with. Please refer to
the specific SEARCH help with the other Help Articles at the Sig Menu
by typing: HELP
WORKSPACE= Your Personal storage area. Remember, you still must XUP or UPLoad
your file here and then SUBmit it.
I am sure there are probably things I have left out, but these basics will
get you started!!! I am really quite pleased with this new database! Please
feel free to offer any comments or added suggestions for it!
HINTS>(SCAN, READ, POST, DELETE, EDIT or EXIT):
5 DATABASE SEARCHING HELP
Keyword Searching
=================
One way to access articles and files in the dat
abases is by browsing ( using the
SCAN and READ commands to see what interests you). However, helpful keywords are
associated with each article, and you can quickly search any category in the
database (or the whole thing) for articles with keywords that interest you.
Here's how to use that useful feature:
The SEARCH Command
==================
Search is the key to keywords! You can use it at the top-level DATABASE> prompt
where it would search ALL topics or at the top-level prompt in each category
(DBASES>). Type SEARCH, and you will see a menu that offers the options.
Starting the SEARCH
===================
You will be able to narrow or expand your search as you go along, creating a
small set of articles to look at. But, to start out (or to start again), you
will want to consider the entire category or database (depending on where you
typed SEARCH) and indicate that you are ready to supply a keyword. Type START
to do this. You will then be prompted to enter a keyword to look for.
Entering a Keyword
==================
If you know the keyword you want, enter it. If not, type a question mark (?),
and you will see a short explanation of what a keyword is. Type ANOTHER question
mark, and you will see a list of ALL the keywords that exist in the current
selection of articles you are looking at. You will also see how many articles
contain each of the keywords. Pick a keyword, and enter it. You'll see a count
of how many items were found.
Currently, you may use any of the following as keywords, in addition to the
specific keywords supplied by the Uploader:
USER NAME
FILE NAME
Date
The Sysops will try to make sure that this information is available for each new
file that goes into a database.
Looking at the Current Selection
================================
Now that you have found some articles, look at the selection by typing SCAN.
You can then use the READ command to look at one or more articles, or you can
narrow or expand your search..b 2
Narrowing the Search
====================
Suppose you searched for the keyword "DISK" and found 75 articles. Too many?
Maybe what you really want is a subset of those. Let's say that what you really
want are those "DISK" articles that ALSO have the keyword "WEDGE". Type the
NARROW command, and you will be prompted for a keyword as before. Type "WEDGE",
and you will create a new selection, a narrower selection of those articles that
contain the keywords "DISK" AND "WEDGE".
Expanding the Search
====================
You may have ended up with a selection that doesn't contain everything you want,
because you either narrowed it too much or need more than one classification of
articles. For example, if you first searched for the keyword "PRINT" and what
you really want is any article that contains the keyword "PRINT" or "READ",
expand the search by typing the EXPAND command, and you will be prompted for a
keyword as before. Type "READ", and you will create a new selection, an
expanded selection of those articles that either the keyword "PRINT" OR "READ",
or BOTH!
Note that a very nice feature of the EXPAND command will report to you the
number of files with the new keyword you specified but that were not contained
in the original search - it will not select these for you, but at least you will
know that there are that many more. It will tell you after you EXPAND the
search:
8 Files found
5 Files available
A NEW search on the second keyword will bring you those 3 other files.
Scanning By User Name
=====================
Since the Sysops will manually add the ability to use the Username of the person
who uploaded the file as a valid keyword, you can easily SCAN to see all the
files from that person!
For example, START your Keyword Search Selection and entering DEB as a keyword
will allow you to see all the file uploaded by DEB. The file search could be
narrowed or expanded from that set of filenames with any of the techniques just
described.
It is also very important to realize that you can enter a KEYWORD and it will
find matching entries which have the first characters of your keyword in it, not
just an exact match.
Therefore, The following keyword entry of D would find any of these:
DEB
DISK
DATA
DOC
And using the keyword MOD would bring up any file which contained any of these
keywords:
MODEM
MODEMS
MODs
MODERN
MODIFICATION
MOD2BASIC.BIN
MODEM300
(etc)
If you have any other questions about using the databases and searching
commands, please feel free to check with one of the Sysops here.
HINTS>(SCAN, READ, POST, DELETE, EDIT or EXIT):
6 FORUM MESSAGE HINTS
When you first enter the Forum, you may wish to read messages other users
have left. The FORUM software will have informed you of the highest message you
have read. Enter one number above that number to read all the messages that
have been left since you last attended the Forum. While reading through a
message you may get the "MORE?" prompt. If you do not wish to continue, answer
NO. Otherwise, simply hitting <return> will continue the message. At the end
of each message, you are returned to the FORUM> prompt. Hitting <return> will
display the next message. Or, you may enter any of the commands discussed here.
Before we move on, a brief discussion of Threads is in order. Simply put, a
Thread is a string of messages on the same subject. A Thread is created when a
user RESPONDs to another user's message. (The RESPOND command is discussed
later.) If a message ends with "Enter FOLLOW for RESPONSE message(s)" then that
file is part of a Thread. To read the Thread enter FOLLOW after every message,
until you are told there are no more messages. CAUTION: When you are done with
a thread the system DOES NOT remember which message you were reading when you
began to follow the thread. You must manually tell the system to start reading
after the thread. This is accomplished by the command READ [msg #] where [msg
#] is one number higher than the number of the message that started the Thread.
This small inconveniencewill be fixed soon as more improvements are made to the
software here, and the little bugs are worked out! You can also just enter the
message number, leaveing the REAd command out, At the FORUM> menu, type 112 to
read messages starting at #112!
Now you know how to read a thread, but how do you make one? With the RESPOND
command. After reading a message you wish to reply to, enter RESPOND at the
FORUM> prompt. You are ask "To?" which means "To what UserName do you wish the
message to be sent. If you want to reply to the person who left the original
message simply hit <return>. You may then enter your message. Enter a CTRL-Z
when you are done, and the message is stored for you.
You may notice that, while you are RESPONDING, you can't edit a line after
you enter the line by hitting <return>. There are two ways around this. The
first is to enter RESPOND /EDIT (WITH the space!) rather than RESPOND. This
places you in the editor while entering your message (see OLDIE.HLP for info on
the editor). The other way is to use the EDIT Command.
To edit a message you left, enter EDIT [msg #] where [msg #] is the number of
the message you wish to change. First, the header of the message is displayed.
You are asked if you wish to change the Topic or the Subject. If you choose to
do so, enter YES when asked, then enter the new Topic/Subject. Then you are
asked if you wish to edit the text of the message. If you enter YES, you are
placed in the editor, with the message waiting (see OLDIE.HLP for info on the
editor).
Now we come to the ADD command. This command allows you to send a new
message to other users. Simply enter ADD at the Forum> prompt. You are asked
"To?". You must enter a valid UserName, or ALL, to send the message to "all".
Then you are asked for a subject. This may be whatever you want, and should
reflect the main thrust of your message. Now, you are prompted for a topic.
This must be one of the topics listed in the new user help file. Please try to
place messages in the topic that best represents your message. Now you can
enter your message. The message may be edited like a RESPONSE mesage, with
either ADD /EDIT (with the space!), or EDIT [msg #].
At times you may wish to see a listing of the message subjects in the Forum,
rather than the whole message. This is done with the DIR command. The DIR
options are:
DIR NEW -- lists all messages that have been left since you were last in the
Forum.
DIR THREAD -- lists all messages in the current thread. This may be issued only
if the message you have just read is part of a Thread.
DIR FROM DEB -- lists all msg from DEB, where DEB is a valid UserName.
DIR TO DEB -- lists all msgs to DEB, where DEB is a valid UserName.
Delphi has made some (long requested) changes to the DIRECTORY command in the
FORUM. The two new options are a directory of a range of messages (
specified by two numbers separated by a colon) and for messages
containing a particular group of characters, word, or phrase in the
subject.
You can also string options together on one command, such as
DIRECTORY FROM DEB TO ALL SUBJECT "new forum commands"
which should list this message!
In short, all the DIRectory options are:
* FROM <username>
* TO <username>
* WAITING
* NEW
* SUBJECT <search-string> -- this will search for specific strings withing the
message header itself. Those strings with imbedded spaces need to be
enclosed in quotation marks. Search strings which include one word
will not need the quotes.
* <low>:<high> -- will scan a range of lines. Reasonable abbreviations are
allowed, such as
DIR 100:200 - scans message headers for numbers 100 to 200.
DIR :200 - lists messages below and including 200
DIR 200 - lists messages starting with 200.
THREAD - when used with a number or range, lists the thread containing the
specified message. When used alone, lists the thread containing the
current message. It can also be used with the SUBJECT qualifier.
These options also work with the READ command.
The Forum also has some powerful ties with Delphi Mail. They are:
MAIL -- all by itself puts you into MAIL. EXIT from MAIL brings you back to wh
ere you were in the Forum.
MAIL <username(s)> -- MAILS a copy of the current Message to the UserName(s) li
sted. You will be prompted for a subject.
MAIL <username(s)> <number> -- MAILS a copy of the message <number> to the User
Names(s). You will be prompted for a subject.
MAIL <username(s)> <text> -- sends a mail message with the subject header cont
aining <text> to the UserName(s).
Examples:
=========
MAIL DEB,JSP Posted some interesting stuff on FORUM
MAIL CNS 45 Subj: Thought you might like to see this.
(^^^^ this puts the text following it in the Subj: field of the MAIL)
FILE <filename> sends a copy of the current message to your work area with the
specified filename. If a file with the name you specified doesn't exist,
then t he system creates the file. If the file already exists, then the
system adds it to the end of the file.
One final point:
At times, what the system thinks is the last message number you have read, and
what the last message number really is can be different. To prevent this, enter
HIGH at the FORUM> promt and enter the number of the last message you have read
when prompted. As more features are added, and the flexibility of this software
reaches its full potential, we will keep you posted. If there is a feature that
you would like to see implemented here, please let us know!
In addition to these exciting new search parameters within the DIR command on
the FORUM, You can now also use WHO and SEND from any FORUM> prompt, just the
same as it can be used at the *FLAGSHIP* prompt.
HINTS>(SCAN, READ, POST, DELETE, EDIT or EXIT):
7 FORUM QUICK REFERENCE CARD
Forum Command = Result
======================
==============
READ WAITING = Read Waiting msgs TO you.
READ NEW = Read New Messages in Forward Sequence
-1 = Read Reverse
2375 = Read Starting# 2375 in Forward Sequence
+ = Read Message Again
FOLLOW = Read Thread ** Note, to continue to FOLLOW the thread, just
press <return> you don't have to enter FOLLOW each time.
BACK = Read Previous Msg
ADD = Leave a Message
ADD /EDIT = Leave a Message and Enter Editor simultaneously
ADD Filename = Add message from your worspace using text in specified file
REP = Reply to Message
REP /EDIT = Reply W/ Editor
DIR = Scan Messages ** Note, DIR also works with the following
additional parameters:
DIR NEW = all new messages
DIR TO DEB = All msgs TO DEB
DIR FROM DEB = All msgs From DEB
DIR THREAD = Msgs in current thread DIR SUBJECT <string> = All messages with
specified string in Subject header
DIR 100:200 = All message between 100 and 200
DIR WAITING = All Messages to you which have not been read yet.
DEL = Deletes a message to
you or from you.
EDIT = Edits Msg from you.
FORward = Send current message in Mail to someone
FILE = Save copy of current message in your work area.
MAIL = Enter Delphi Mail
TOPics = Show Accessible Topics
SET = Set one or more specific Topics be sure to use CLEAR First tho!
HIGH = Show High Message #
or re-set it.
BYE = Log Off
WHO = Shows WHO is on the SIg currently
SEND = Sends the USERNAME a specific private message you enter.
HINTS>(SCAN, READ, POST, DELETE, EDIT or EXIT):
8 MAIL FOR THE NOVICE
MAIL Quick-Start
":::BEEP!::: You have 4 new Mail messages."
"What now?", you say. Delphi has just notified you that you have
new MAIL messages waiting. How do you read them?
Simple! Just type MAIL at any SIG's first-level prompt
(*FlagShip*>, etc.). You'll again be told how many messages you have
waiting. At this point you can just press RETURN to start reading
these new messages. Or, you can get a directory of the new messages by
typing DIR. This will show you who the messages are from and what
their subjects are.
"So now what?" Just press RETURN to begin reading at the first
message, or type the number of the message you want to start with.
"OK... now I've read a message. What do I do now?" No problem.
There are basically 5 things you can do with a message that you've just
read: delete it, save it to your workspace, reply to it, forward it to
someone else, or let it pass into your old MAIL folder.
To delete a message, type DEL at the MAIL> prompt after reading
it.
To save it to your workspace, type EXTRACT <filename> at the
MAIL> prompt. If you don't want to keep the message heading (TO:,
FROM:, SUBJ:) in the file, type EXTRACT/NOHEADER <filename>.
To reply to a message, type RE at the MAIL> prompt. If you think
you might want to edit the reply as you enter it, type RE/EDIT.
To forward a message to someone else, type FOR at the MAIL>
prompt. You'll be prompted for the Username and subject.
To keep the message in you old MAIL folder, just go on to the
next message or exit MAIL.
"Great! I think I've got it. Now... how do I get out of MAIL?"
It's easy! Just type a ^Z (that's computer-talk for CONTROL and Z
pressed at the same time), or type EXIT. Any unread messages will
remain as new MAIL; any messages that you haven't deleted will go into
your old MAIL folder.
WARNING! MAIL takes up a lot of space, and you get charged for
storage over 25K. Be sure to delete messages you don't really want to
keep, and use the COMPRESS command often. See the other HELP files for
information on COMPRESS.
HINTS>(SCAN, READ, POST, DELETE, EDIT or EXIT):
9 MAIL TUTORIAL
GETTING STARTED with Delphi MAIL
You can get to Delphi MAIL from the MAIN> Delphi prompt or any first-level
SIG prompt (*FLAGSHIP*>) by typing MAIL. You can also get there from any
SIG FORUM>, also with the MAIL command.
To become familiar with MAIL, use the twelve MAIL commands discussed in
this section. These twelve commands will enable you to move around within
MAIL.
You can get help on *many* other MAIL commands by typing HELP from the
MAIL> prompt.
These are the twelve MAIL commands discussed in this section:
SEND DIRECTORY EXTRACT
READ[/NEW] DELETE FORWARD
MOVE HELP REPLY
SELECT EXIT COMPRESS
The first command to try is the SEND command. Try sending a message to
yourself. Enter the SEND command and press RETURN. Enter your own user
name at the prompt and press RETURN. Enter a subject when prompted and
press RETURN again. The following example shows how to use the SEND
command:
MAIL> SEND
To: PIERCE
Subj: Sailing
Enter your message below.
Press CTRL/Z when complete, or CTRL/C to quit:
When you finish entering the text of your message, press CTRL/Z. Because
you are sending the message to yourself, MAIL will signal that you have
just received a new message by displaying the following message:
New MAIL on node FLAXEN from PIERCE
MAIL>
Now, you are ready to use the READ command. To read the message you just
sent to yourself, enter the READ command with the /NEW qualifier and press
RETURN.
MAIL> READ/NEW
You must specify the /NEW qualifier with the READ command when you want to
read new MAIL that arrives while you are in the MAIL Utility. When you
are not in the MAIL Utility and you receive new MAIL, then invoke MAIL to
read the new message, you can enter the READ command without the /NEW
qualifier. Or, if you wish to read MAIL that you have already read, you
can also enter the READ command without the /NEW qualifier.
You can forward a copy of a MAIL message to another user by entering the
FORWARD command. MAIL will prompt you for the name of the user to receive
the message. Try forwarding a copy of the message you just received back
to yourself. Enter your own user name and press RETURN. Supply a subject
when prompted and press RETURN. MAIL will signal that you have just
received a new message. Enter the READ/NEW command to read the forwarded
message.
When you receive a message and want to respond to it, enter the REPLY
command and press RETURN. MAIL will display the header information as
follows:
MAIL> REPLY
To: FLAXEN::PIERCE
Subject: Re:Using the REPLY command
Enter your message below.
Press CTRL/Z when complete, or CTRL/C to quit:
When you finish typing your response, press CTRL/Z. Again, MAIL will
signal that you have just received a new message. To read the message,
enter the READ/NEW command.
When you want to see a list of all the MAIL messages you have collected,
enter the DIRECTORY command and press RETURN. MAIL will display a list
like the following:
# From Date Subject
1 FORBES 1-JUN-1985 How to Write a Memo
2 STELLA::BERT 2-JUN-1985 Using the Printer
3 FROST::BASTIEN 4-JUN-1985 Chicken Kiev
When you want to remove a message, use the DELETE command. You can either
enter the DELETE command while you are reading the message or you can
enter the DELETE command followed by the number of the message you want to
remove. To remove the second message in the list, enter the following
command line:
MAIL> DELETE 2
If you enter the DIRECTORY command after you have deleted a message (or
messages), you will see the messages marked for deletion, as the following
example shows:
# From Date Subject
1 FORBES 1-JUN-1985 How to Write a Memo
2 (Deleted)
3 FROST::BASTIEN 4-JUN-1985 Chicken Kiev
When you exit from MAIL, the messages marked for deletion will disappear.
The MAIL Utility allows you to organize your messages by moving them into
folders. To move a message to a folder, enter the MOVE command (while you
are reading the message) and press RETURN. MAIL will prompt you for a
folder name. Type any name, for example, REVIEWS or JOKES or
STATUS_REPORTS. MAIL will also prompt you for a file name. You can
specify the default MAIL file by pressing RETURN. A sample session
demonstrating the MOVE command follows. (The folder name is WINNERS and
the default MAIL file is specified.) If the folder you name does not
exist, MAIL will ask you if you want to create it.
MAIL> 2
MAIL> MOVE
_Folder: WINNERS
_File: <ret>
Folder WINNERS does not exist.
Do you want to create it (Y/N, default is N)? Y
Folder WINNERS created
Once you have created folders, you will want to move between them. To
move from one folder to another, use the SELECT command. If you want to
move to the WINNERS folder, enter the following command line. (MAIL
displays a message indicating the number of messages in the folder.)
MAIL> SELECT WINNERS
1 message selected
To move to a folder named JOKES, enter the following command line:
MAIL> SELECT JOKES
32 messages selected
You can enter the DIRECTORY command to see a list of the messages in the
folder you just selected.
When you want to move a MAIL message from your MAIL file to a sequential
file that you can access from your workspace, use the EXTRACT command.
Enter the EXTRACT command (while you are reading the message) and press
RETURN. MAIL will prompt you for the name of a file. Then, when you exit
from MAIL, the file will be listed in your main directory. The following
example shows how to use the EXTRACT command to move a MAIL message to a
file named GAMES.DAT.
MAIL> EXTRACT
_File: GAMES.DAT
GAMES.DAT;1 created
MAIL>
You can get some *really* extensive documentation on MAIL by typing HELP
at the MAIL> prompt. You'll get a list of topics to choose from. If you
do this, *please* have your capture buffer open since there's *way* too
much information here to digest online.
COMPRESS makes an ISAM MAIL file smaller. You should periodically use the
COMPRESS command in MAIL to reduce the size of the MAIL.MAI file stored in
your workspace since you are charged for storage exceeding 25K bytes (50
Delphi blocks).
When you compress a file, the following four steps occur:
1 A temporary file named MAIL_nnnn_COMPRESS.TMP is created. (nnnn is a
unique, four-digit number.)
2 The contents (of the file to be compressed) are copied to the temporary
file and compressed.
3 The original (uncompressed) file is renamed with a file type of OLD.
4 The newly compressed file is renamed from MAIL_nnnn_COMPRESS.TMP back
to its original name.
HINTS>(SCAN, READ, POST, DELETE, EDIT or EXIT):
10 MORE ADVANCED MAIL COMMANDS
Let's face it, if you can even consider advanced MAIL commands, you should be
able to make sense out of the built in system MAIL HELP files. Please read
them!
HINTS>(SCAN, READ, POST, DELETE, EDIT or EXIT):
11 QUICK CONFERENCE COMMAND CARD
** QUICK REFERENCE FOR CONFERENCE**
Within any group on Conference,
you can use any of the following
Immediate Commands:
/Accept = accept a page
/Answer = same as accept
/Bye = logoff the system
/Cancel = cancel all pages
/Exit =leave group (CONTROL Z)
/Gag = No SENs recieved from outside
/Glock =Lock groupname
reverse = /Noglock
/Gname <groupname> = Name a group to
make group private simply use
the word PRIVATE in name.
/Gname = List of group attributes ie If private passworded ect.
/Gpass = set password for group
reverse = /gnopass
/Gprivate = Make group private
reverse = /Nogprivate
/Gquiet = No announcment of arrivals
reverse = /Ngoquiet
/Help = List of commands
/Join <group>
/Log <filename> = save co to WC file
/Mail =Go to mail
/Menu = sets prompts 1,2,3
/Name = <name>(Change your name)
/Page =request talk
/Pass = set password
reverse = /Gnopass
/RName =REAL USERS name
/Reject = Reject a PAGE
/Repeat = no repeat of lines(toggle)
/Schedule = Conference schedule
/Send <name> <msg> = Private message
/Squelch <name> = silence user
/Talk <group> = join another group
/Time = EST
/Who = List of groups and Users
/Whois <name> = (Get PROFILE)
CONTROL R = Redisplay the line you
just typed. (BEFORE hitting return).
CONTROL U = Cancel the line you
just typed. (BEFORE hitting return).
CONTROL Z = EXIT
HINTS>(SCAN, READ, POST, DELETE, EDIT or EXIT):
12 REAL TIME CONFERENCING GUIDE
CONFERENCE is DELPHI's interactive conversation system.
Here you can have an
online chat with other DELPHI users.
To get to the CONFERENCE area, select the 'Conference' option from the
FLAGSHIP COMMODORE main menu.
Text that you type while in a CONFERENCE group is sent to the other members
of that group when you press RETURN. Text sent by other group members is shown
to you following the "speaker's" name. Don't worry if your text is interrupted
by someone else's text; the system keeps track of what you've typed. If you get
confused, a CRTL-R will echo what you've typed so far; CRTL-U or CTRL X will
cancel a line if you haven't already pressed RETURN.
CONFERENCE MENU:
----------------
WHO (list users)
PAGE a user
JOIN a group
NAME nickname
EXIT
WHO - displays a list of all conference groups and the members of each one, and
the people using the CONFERENCE system who are not talking with anyone right
now (idle). WHO will also list what users are PAGE-ing what other users (if
there are any); finally, it will list all FLAGSHIP COMMODORE users online.
Of course, anyone who is not in the CONFERENCE system will show with their
Delphi username and not a nickname, because nicknames exist only within
CONFERENCE.
(Same as immediate command /WHO.)
PAGE - solicits a conversation wit
h other users on the
DELPHI system, both those
in CONFERENCE and those doing something else. This is like having someone
paged at the airport, when you do not know where they are. Note that the
PAGE command is the only way to invite someone to join a PRIVATE group. (Same
as immediate command /PAGE.)
JOIN - joins an existing discussion group (you can list these using WHO), or
starts a new one. You can give the name of the group you wish to join after
this command, as in "JOIN Chatters". If you do not supply the group name,
you will be prompted for one. You may also give the number of the group you
wish to join (shown in WHO) or an abbreviation of the group name. (Same as
immediate command /JOIN.)
NAME - sets or displays your CONFERENCE nickname (or 'handle'). Your name may
have upper and lower case characters. You may not steal the name of anyone
else who is using the CONFERENCE system at the time. Note that your NAME is
not saved between CONFERENCE sessions. When used without a nickname, NAME
will list your status - name, logging, squelching, password, and the groups
you are in. (Same as immediate command /NAME.)
EXIT - gets you out of CONFERENCE. You are then returned to wherever you came
from, normally the FLAGSHIP COMMODORE main menu. You may also use CTRL-Z to
get out. (Same as immediate command /EXIT.)
GROUP INFORMATION:
------------------
Conference groups can have attributes.
PRIVATE - if a group's name has the word "PRIVATE" in it, then people will not
be able to just join, but must be invited or know the password. By using the
/GPRIVATE and /NOGPRIVATE commands, you can control a group's private
attribute independently of the name.
PASSWORD - a group may have a password assigned. People who wish to join must
set their own password (/PASS command), and then join. (/GPASS & /NOGPASS)
QUIET - a 'quiet' group is one where you are not disturbed by people coming and
going. You will not get the "just joined" or "- signed off -" messages. Note
that this is potentially hazardous to the privacy of what you say: someone
could join your group and listen without you knowing! Fortunately,
CONFERENCE will tell you when this group attribute is turned on. (/GQUIET &
/NOGQUIET)
LOCKED - a 'locked' group has several privileges reserved for the 'group
manager', who is normally the first person in the group. (/GLOCK & /NOGLOCK)
IMMEDIATE COMMANDS:
-------------------
/Accept /Answer /Cancel /Exit /Gag /Glock /Gname <name>
/Gpass /Gprivate /Gquiet /Help /Join <group> /Log
/Mail /Menu /Name <nickname> /Page <user> /Pass /Reject
/Repeat /Rname /Schedule /Send <name-list> <msg>
/Squelch <name> /Talk <group> /Time /Who /Whois <name>
At any point while in CONFERENCE, you may use one of these immediate
commands. They are mainly intended for use while you are within a conversation.
All the immediate commands start with a slash (/).
Note: in the following descriptions, <user list> denotes a list of one or more
Delphi usernames or CONFERENCE nicknames, separated by commas.
ACCEPT - a PAGE request. If you are outside the CONFERENCE area, "ACCEPT" (no
/) will take you directly to the PAGEr's group without having to go through
the
CONFERENCE menu. (See /REJECT)
ANSWER - same as /ACCEPT.
CANCEL - forgets ALL PAGEs you have issued.
GAG - disables any SEND's to you except from people in your group. (You will
get SENDs from people who have a group in common with you, if you or they are
in more than one group.)
GLOCK - sets the LOCK group attribute. See GROUP INFORMATION above.
GNAME - lists group attributes: private, locked, quiet, password-protected. See
GROUP INFORMATION above for more information on group attributes.
GNAME <group name> - assigns a new name to the current group. The group name
chosen should reflect the current topic of discussion so that other users can
decide if they would like to JOIN the group.
GPASS <password> - sets the LOCK group attribute. See GROUP INFORMATION above.
GPRIVATE - sets the PRIVATE group attribute. See GROUP INFORMATION above.
GQUIET - sets the QUIET group attribute. See GROUP INFORMATION above.
HELP <immediate command> - displays online help for immediate commands. For
instance, /HELP /NAME - describes the NAME command.
JOIN <group name> or <group number> - same as JOIN from the CONFERENCE menu. If
you are already in a group you will be switched to the new group.
LOG <file name> - turns on transcripting, recording everything you see into a
file. For example, /LOG CON.TXT will save the current conversation in the
file CON.TXT in your personal workspace. If you want to see your own part of
the conversation, REPEAT must be ON. You can turn off LOGing with /NOLOG.
MAIL - gets you to the normal Delphi MAIL menu. From here you may send & read
mail messages as usual. CTRL-Z from MAIL to get back to the group.
MAIL <user list> <message text> - sends a quick 1-liner to someone without
having to enter MAIL the usual way. This is handy if the user is not
currently accepting /SENDs (see GAG).
MENU <menu level> - sets the type of prompt you'll see while in the CONFERENCE
area. /MENU 1 gives the briefest prompts; /MENU 3 gives the fullest.
NAME - same as NAME from the CONFERENCE menu.
PAGE - same as PAGE from the CONFERENCE menu.
PASS <password> - sets your password for use in JOINing password-protected
groups. See GROUP INFORMATION above. Note that this has ABSOLUTELY NOTHING
to do with your Delphi password. NEVER reveal your Delphi password to other
users, in CONFERENCE or anywhere else.
REPEAT - toggles ON and OFF. When ON your text will be shown to you in the same
way as other's text is. When OFF your text is not shown to you (except as
you type it, of course!). Some people get confused seeing their own messages
twice, others like to see it repeated so they know when the other people in
the group saw the message. It also helps you be sure your message was sent.
REJECT - a PAGE request. The PAGEr will be notified that you don't wish to talk
to him.
RNAME <nickname> - displays the real name (Delphi username) of a user. Use /WHO
to get a list of current users. You'll need to know the username if you want
to use /WHOIS or to send MAIL.
RNAME <username> - displays the nickname when given a real name.
SCHEDULE - shows you the CONFERENCE schedule. CTRL-Z from SCHEDULE to get
backto the group.
SEND <user list> <message text> - sends a short message to any FLAGSHIP
COMMODORE user online, whether in CONFERENCE or not. /SEND will fail (and
you'll be notified of the failure) if the user has issued the /GAG command.
See MAIL for what you can do in that case.
SQUELCH <user list> - prevents you from seeing any text sent by a specified
user. You won't see a /SQUELCHED user's /SEND's or comments if he is within
your group. Remember that if you /SEND to him, he can't answer you! You can
list your current squelches with /SQUELCH or /NAME alone. Un-SQUELCH with
/NOSQUELCH <user list>.
TALK <group name> or <group number> - /JOINs a new group, but does not cause you
to exit the CONFERENCE group you are in. Using /TALK, then, can enable you
to be in multiple groups at the same time, to a maximum of 8 groups. In
effect, you are LISTENING to all the groups you are in, but only TALKING to
one at a time. You may switch which group you are talking to at the moment
by using the /TALK command again. You may also say, simply: /<group number>,
which has the same effect. Leave a group by talking to it and then using
CTRL-Z, /EXIT, or /JOIN.
WHO - same as WHO from the CONFERENCE menu. You'll need this information for
issuing the /JOIN, /PAGE, /SEND, /MAIL, etc. commands.
WHOIS <username> or <nickname> - displays the user's I-AM/WHO-IS information
from the Main Delphi PeopleNet member directory. You can enter information
about yourself by selecting "Member Directory" from the main FLAGSHIP
COMMODORE menu.
***> New COnferencing Commands <***
BYE - /bye will allow you to log off of Delphi directly from COnference.
ECHO - will turn your Delphi Full Duplex echo on.
NOECHO - will turn your Delphi HALF Duplex on, in other words, it kills the host
echo and you must supply your own local echo for what you type. This is an
especially handy command for those of you with split screen capabilities. Try
using your split screen in Conference with /NOECHO and /REPeat *ON*!
HINTS>(SCAN, READ, POST, DELETE, EDIT or EXIT):
13 THE BASICS OF UPLOADING
How to Upload a File to a database:
==================================
Member participation is the lifeblood of this or any other special interest
group. We encourage you to assist us in serving you by sharing your programs
and ideas with other members of the group.
Programs are shared by UPLOADING your program to the database. This is done by
the XMODEM protocol.
For information about uploading TEXT files without using XMODEM, please see
instruction article under HELP at the *FlagShip*> menu referring to Text
Uploads.
The following steps are the way to have your file join the others in your
databases. The process is easy and rewarding. Uploading involves two things,
first uploading the file to your personal work area, and then next submitting
the file to the database. Follow these easy steps the first couple times:
1. Log on the system normally.
2. Enter the Flagship Commodore and select the DATabase option. Choose a
Database Topic and enter that database.
3. Select the WORkspace option from the Database menu.
4. Type: XUP <filename>.<file extender> Files in your Personal Storage Area
may have up to 9 characters and a three characater extension: IE:
PROGRAM.BIN
5. Wait for the system to cue you to transmit your file. It will say:
OK, Send!
6. On the cue from Delphi, set up your terminal for XMODEM uploading. (Delphi
is ready to receive at this point.)
7. Delphi and your terminal program will let you know when the upload is
complete.
8. Type: DIR and make sure your file is listed on the display.
10. Exit your personal storage area with a ^Z or by typing "exit".
11. Choose the appropriate database topic to submit your program to and enter
that database. If you have any questions about the contents of the
databases, you might refer to the articles describing each topic and
subtopic.
These are available by selecting TOPICS from the main *FlagShip*> menu.
12. At the database prompt for your chosen topic, enter the command:
SUB ((short for SUBmit))
13. Delphi will first remind you that the file you are submitting must be in
your personal file area. Entering either a "Y" or a <return> will allow the
submit process to continue.
14. The next question determines whether or not the files will be submitted as
one of a group or in a single entry. Only try to submit multiple files if
they are part of a group.
The Grouping of files in this new database is an incredible new advance in
public domain databases!!
15. If you entered more than 1 file, the program will double check that the
files are related. Answer yes if they are.
16. You will then be asked to select from a list of file types. The majority of
programs and files submitted will be of the one "Program or Program Pack".
A group of files would contain all program files neccesary for it, as well as
any supplementary data files, text files and instructions or documentation.
This makes a PROGRAM PACK.
17. At the Topic? prompt, enter just the first three letters of the database you
wish the file(s) to appear in. These are the regular database topics that
appear in the SIG.
18. Name for Group/Set:
Programs which are part of a group will need you to determine a GROUP name for
them at this point. Remember that they will appear in the database with this
Group Name. They will still have individual names which appear within that
group.
See some of the examples in the databases now for an idea of how they look. You
may use up to 32 characters in the name, including spaces, symbols or
numbers(but no question marks!). In other words, Just Plain English!!!
19. Provide a brief description of the file (8 lines or less) when asked by the
system. Exit with a CNTRL-Z.
21. Delphi then asks you for any additional keywords. You may enter any
keywords of your choice. (Subject to the rules of good taste!)
Additional keywords should include:
* your user name
* filename
* specific words that describe the file
A blank line or a CTRL Z will signal the end of the keyword entering.
22. If you are submitting files in a Program Pack, or Group, you will be asked
the following information about each one, if its only one file, then you will
only be asked once!
23. Workspace Filename:
This is the name of the file as it appears in your Directory of your personal
storage area, the name you gave it when you uploaded it.
24. Download Name:
If it requires a specific name when downloaded, you can enter that in at the
next prompt. This will only appear to the person when they download the
file-just before entering the XMODEM downloading routine.
25. Display Name:
This is the name you want it to appear as in the database. It can contain up to
32 characters, including spaces, symbols, or numbers(but no question marks!).
Lets try to keep our databases some of the easiest to understand, OK?
So, instead of having to look at something like:
TXT2BAS.BIN
You can see:
Text To Basic Conversion Program
Text to Basic Conversion Docs
26. Your file is then transfered to a special Preview area for the Database
manager to review. It is still in your workspace at this time, tho, and you
can tell the program whether or not you want it deleted.
Remember, the file does NOT have to remain in your work area now, so unless you
need it there, its best to delete it before you add up too many blocks and
are charged for storage.
27. Its done! Any more sets of groups or single file submissions can just be
started from the database with a SUBmit command.
HINTS>(SCAN, READ, POST, DELETE, EDIT or EXIT):
14 TO UPLOAD IN TEXT MODE
How to Upload a Text File
=========================
The following steps are the way to have your file join the others in our
databases. The process is easy and rewarding.
Many people may need to upload TEXT files without the benefit of XMODEM. This
will help you do that!
1. Log on the system normally.
2. Enter the Flagship Commodore and select the DATabase option.
3. Select the WORkspace option from the Databases menu.
4. Enter: /noecho
This will put you in HALF duplex mode, and you will be typing blind until you
set your terminal program to half duplex also. Fast Text transfers on a C-64
seem to be much better at half duplex.
5. Type: CREATE <filename>.<file extender>
6. Wait for the system to cue you to transmit your file.
7. On the cue from Delphi, set up your terminal for the buffer dump or the file
read direct from disk. Each terminal program has a different command for
accomplishing this.
8. When your tranmission is complete type a CTRL Z to exit and save the file to
your Delphi work area.
9. Type: DIR and make sure your file is listed on the display.
10. Refer to the New Xmodem uploading help files for the correct commands to
SUBmit your text files to the database.
**BE SURE to delete the files from your workspace once you've finished
SUBmitting them. You only have 64K of 'free' disk space on Delphi, and will be
charged 16 cents per month for each additional 2K.
HINTS>(SCAN, READ, POST, DELETE, EDIT or EXIT):
15 XMODEM BOOTSTRAP INSTRUCTIONS
* Need a Working XMODEM? *
Now you can use your terminal program that buffers only to do a little bit of
magic that we call Bootstrapping!
In our Telecommunications Database, you will find a set of files that you can
use the command: LIST to put them into your terminal buffer. The instructions
and accompanying programs will show you step by step just how to make your own
XMODEM starter program to download one of the more complete and sophisticated
XMODEM programs like XMOBUF!!
To access the instructions, and accompanying filees, just enter the
Databases.
Choose TELEcommunications for your topic, and at the DBases: TEL> prompt type:
READ XMODEM STARTER
Then buffer EACh of the three files separately into your terminal program
buffer, follow the instructions,
and you should be in business!!!
HINTS>(SCAN, READ, POST, DELETE, EDIT or EXIT):
16 ^ PREPARING TEXT OFFLINE
You can save a considerable amount of
connect time by preparing your messages
offline and uploading them!
First, these are the general directions
for using this SIG and DMAIL-you will
have to refer to your terminal program
for the specific commands to implement
these functions at your end.
Here's the scenario:
1. You log into the SIG, and have
messages waiting.
2. You read your messages capturing
them to your buffer.
3. You also check the other topics
for messages which you might be
interested in, capturing these
to your buffer also.
4. Log OFF.
5. Print out your buffer of messages
so that you will have them in front
of you as answer the messages.
6. Boot up your text editor or word
processor. Usually, you wil want
to stick with something which
creates standard CBM SEQ files,
and many times your terminal
software will demand that your
input files be in ASCII, too.
7. Answer each message, and save them
to disk.
A. Be sure to keep your lines
under 78 characters.
B. Press <return> at the end of
each line!
C. Remember to include the SIG
formatting commands.
8. Load in your terminal program,
and log back onto the SIG.
9. with the printed copies and the
list of filenames for your
responses handy, now is the
time to start uploading your
replies.
10.First, on the hard copy of
the first message, locate the
Message number. For now, lets
pretend it is message # 99999.
11.At the Main *FlagShip* Menu, choose
to enter the FOrum.
REad the specific message
number (s) you wish to respond
to by entering the message
number all by itself:
99999
12.Then type:
REP
This allows you to REply to the
message without having remember
the UserName of the person!
13.Now, you are looking at the
regular message prompt for the
indicating it is time for you to
upload your message.
If you want, you can also type
REP /EDIT to invoke the editor
as you create your response.
14.UPLOADING your Message:
A. Please review the ins and outs
of text uploads in the HELP
articles at the Main *FlagShip*>
Menu.
Give your terminal
the filename and either send
it from the disk or load your
buffer and send it from your
buffer!
15.Exit with a CTRL Z or the /ex for
the OLDIE editor.
16.Repeat from step 10 with the next
message number, being sure to
zero your buffer of the previous
message if you are using a bufffer
method!
By using the REply option
you are doing several things,
the first and most important, is that
you are keeping the thread alive, and
that all discussion on a particular
topic will appear in a complete thread!
The other thing that this will save you
is having to type in the Name, ID#,
and subject of the new message.
I am sure that this small example will
help everyone. Please refer to your
terminal program documentation for
more specific information about how
to use the commands to upload from
text files or your ram buffer.
If you have any questions, please
feel free to leave a message to
SYSOP and one of the sysops will
try to get back to you as soon as
possible!
Thank you!
deb!
HINTS>(SCAN, READ, POST, DELETE, EDIT or EXIT):
17 ^ USING YOUR WORKSPACE
WRITERS-CORNER Here you can create, edit, delete, upload, download and otherwise
maintain files of text. You can also PUBLISH text, which sends it to the
*FlagShip* Sysop who will put in the database after testing it.
Note that within Writers Corner you may put filenames on the command line, for
example: DELETE FOO.DAT
Additional information available: APPEND CATALOG COMMON COPY CREATE DELETE
DOWNLOAD EDIT FILE-SYNTAX HOME LIST PUBLISH PURGE TYPESET UPLOAD
XDOWNLOAD XMODEM XUPLOAD
WRITERS-CORNER APPEND Allows you to append one file to another. Neither
original file is deleted. Example: WC> append a.a b.b This copies file A.A
onto the end of B.B, thereby changing B.B
WRITERS-CORNER CATALOG Lists the files you have available, with the file size
and creation date/time. File sizes are in units of 'blocks,' where a block is
512 bytes. This command is identical to the DIR command. *(You are allowed 50
BLOCKS without an additional charge.)
WRITERS CORNER CREATE Lets you type in a new file. Backspace or Rubout will
delete a character, slash commands work (/time, /exit) in here, so you must use
TWO slashes to create a line starting with a slash: //one slash End with CTRL/Z.
You may also 'abort' with a CTRL/C, but the file will be created just as if you
used a CTRL/Z.
WRITERS-CORNER DELETE Lets you delete a file. Will prompt you for each version
if multiple versions exist. If you don't want to have to answer "YES" to the
"Delete, yes or no?" question for each file, do this: WC> del
foo.dat;*/noconfirm This will delete all versions of the file FOO without asking
you about eachone.
WRITERS-CORNER DOWNLOAD Types out the file to you with a delay, CTRL/Z, BELL at
the end. This 'protocol' may not be suitable for you. Read the help on XMODEM,
XUPLOAD and XDOWNLOAD for an alternative.
WRITERS-CORNER EDIT Invokes the text editor SOS to edit the file you specify.
(Or whichever editor you have chosen in the SIG. If it is a new file, you should
terminate your text entry with CTRL/Z (to get to the * prompt) and the two
keystrokes: "E RETURN" to exit. While at the * prompt of SOS, you can type H to
get help on how SOS works. While within SOS, you cannot use backspace (ascii 8)
to erase characters. You must use RUBOUT for that purpose (ascii 127 decimal).
More detailed help on SOS is available online by entering HELP EDITOR.
WRITERS-CORNER FILE-SYNTAX Delphi filenames consist of three parts: - Name (up
to 9 letters/digits) - Type (up to 3 letters/digits) - extension (number from 1
to 32767) Example: NAME.TYP;1 The dot and semicolon separate the 3 parts of the
filename. Ordinarily, the extension numbers are automatically supplied. They
start at 1 and increase each time you make a new file for that name.
WRITERS-CORNER LIST Lists a file to your screen. You either give the name of
the file on the same line as the LIST command, or you give it when you are
prompted for it. Compare to the DOWNLOAD command.
WRITERS-CORNER PUBLISH Sends a file to the *FlagShip* Sysop requesting it be
placed in the database.
WRITERS-CORNER PURGE Purge will delete all versions of files except the most
recent. For example, suppose you do WC> catalog memo. MEMO.;3 10 9-JAN-1984
MEMO.;2 9 2-JAN-1984 MEMO.;1 8 1-JAN-1984 WC> purge memo. Then only
the ;3 version will remain, the older versions will be deleted. **NOTE: If you
don't specify the file to be purged, ALL your files will be purged. ( That is,
all but the most recent versions of all your files will be deleted, which isn't
too dangerous!)
WRITERS-CORNER TYPESET Send mail to SERVICE for details. An interactive
typesetting request form will be implemented soon.
WRITERS-CORNER UPLOAD Like CREATE, except that DELPHI will not echo any
characters. UPLOAD allows you to send a file from your microcomputer to Delphi.
You can get an optional linefeed confirmation after each line you transmit.
Your program should end transmitted lines of text with "RETURN" only (not
RETURN+LINEFEED) for best results. A more sophisticated upload facility
(Christensen protocol, Modem7) is available by using the XUPLOAD command. Read
the help on XMODEM also. Compare to CREATE, DOWNLOAD, and XUPLOAD.
WRITERS-CORNER XDOWNLOAD The XDOWNLOAD command allows you to transfer any file
from Delphi to your microcomputer in an error-free way. See the help topic on
XMODEM for an explanation of how it works. Example: WC> XDOWNLOAD for.me Ok,
receive! (unblocked) At this point, you instruct your terminal program to start
an XMODEM receive of a file. You tell your program what name to give the new
file (using the same name is helpful). Your program will signal Delphi to begin
the transmission. When your program tells you that it is done, you can resume
normal operation and continue with your Delphi session (type a RETURN to see the
WC> prompt again). Some XMODEM programs won't instruct Delphi to start file
transfer until they have "timed out," which means you may have to wait 10 or 20
seconds for the transfer to begin. If at any time you wish to abort the file
transfer, type three CTRL/C characters in a row.
Special Chars: If your system is not transparent to all ASCII characters, you
won't be able to use XMODEM. For example, if your modem uses Control/A as an
'attention' character, you won't be able to upload files using XMODEM,
because your computer needs to send a Control/A (SOH) to start a data block.
WRITERS-CORNER XUPLOAD The XUPLOAD command allows you to transfer any file from
your microcomputer to Delphi in an error-free way. See the help topic on XMODEM
for an explanation of how it works. You can transfer ordinary text (printable)
files as well as binary or executable files. You can upload spreadsheets and
word processing files. Of course, most of these files can't be used on Delphi,
they are only usable when you (or somebody else) downloads them again (using
XDOWNLOAD) to another microcomputer. Example: WC> XUPLOAD FOR.ME Is this a text
file (? for explanation) ? YES Ok, send! (unblocked) At this point, you
instruct your terminal program to start an XMODEM transmit of the file. You
tell your program what file you want to send (using the same name is helpful).
Delphi will wait several minutes for your program to begin transmission. When
your program tells you that it is done, you can resume normal operation and
continue with your Delphi session (type a RETURN to see the WC> prompt again).
If at any time you wish to abort the file transfer, type three CTRL/C characters
in a row.
** NOTE THIS WELL ** You are charged for any storage over 50 Delphi blocks each
month. BE SURE to delete files from your workspace once you have submitted
them. When Delphi offers to delete a file for you, always choose the YES
option, unless you have some compelling reason to keep the file.
HINTS>(SCAN, READ, POST, DELETE, EDIT or EXIT):
18 _ EDITING ONLINE WITH OLDIE
OLDIE
=====
OLDIE is the new line editor for SIG messsages, mail and WC file editing.
This should be already set upon entering this SIG. The only real way to tell,
however, is to ask to EDIt a message. If you get an * ASTERISK, then you are
not set to OLDIE. When first starting an Edit on a file with OLDIE, it will
report how many lines are in the file, and no asterisk will appear.
If you would like to use OLDIE and are not set for it, please leave a message
to your SIG manager or one of the assistants.
The commands are:
/a APPEND current line.
/b BOTTOM of file
/c change current line: /c/[oldstring]/[newstring]
/d DELETE current line
/e EXIT
/g GLOBAL search and replace: /G/OLDSTRING/NEWSTRING
/h HELP should give you this list
/i INVISIBLE toggle-toggles line prompts on/off. defaults to ON
/l LOCATE: /l/[string]
/n NEXT (positive number moves that many line forward, negative that many back)
/p PRINT current line - can specify more than just one line.
/q QUIT without saving the text
/r REPLACE current line with new one: /r/[new text]
/t TOP of file
/w WHERE is current line?
To invoke this editor, use the following commands on the FORUM>.
To add a new message: ADD /EDIT
To REply: REPLY /EDIT
To invoke this editor in your Work Area, choose DATABASES from the Main SIG
menu, and any topic, then choose Work space, and you just type:
EDIT filename.ext If the file already exists, you will be placed in it, if it
doesn'T exist, it will be created for you to start.
To invoke OLDIE while SENding your MAil, at the SIG menu, choose MAIL.
To send a messsage: SEN /EDIT
**Please note that eacch of these commands has a SPACE before the /EDIT.
HINTS>(SCAN, READ, POST, DELETE, EDIT or EXIT):
19 _ FORMATTING MESSAGES
Formatting Commands for FORUM> Messages
Here is a quick reference for using the textrieve formatting commands that
re-format our FORUM> messages:
.lm 8 = Left Margin must be used with
value of left margin.
.b 2 = Blank Line. Can be used with
a value or by itself will
defalt to 1.
.i 5 = Indent. Can be used with a
positive or negative value
to move the line forward or
backwards on the indentation.
This will ONLY work after a
.B command.
.wm 5 = Wrap Margin. Will indent any
lines that must be wrapped
around to the next line by
the value specified.
.lt = Literal. Turns off any re-
formatting. The text should
appear just as you type it in
until .EL is encountered.
.el = End Literal. Turns the
text formatting back on.
HINTS>(SCAN, READ, POST, DELETE, EDIT or EXIT):
20 _ SLASH COMMAND SUMMARY
Handy /Slash Commands
---------------------
Well, from almost anywhere in the SIG, these commands will have the following
effects:
- Immediate "/" Commands -
/ECHO - Enable character echo
/NOECHO - if you supply echo
/EXIT - same as CTRL/Z
/GAG - disable CONF msgs
/LENGTH 24 - set page size
/NOGAG - re-enable msgs
/PROMPT 1,2, or 3
/TIME - show time
/WHOIS username
/WIDTH 40
Using a /LEN of 0 will get rid of all of the More? prompts as you read.
I use the /WID one all the time to switch from screen formatting to printer
formatting depending on what I am doing.
When in the middle of many repetitive menus, the /PROMPT 1 will cut it to
command level, but not permanently, and a "?" will always bring back all your
choices.
When doing buffer uploads for messages or text uploading for files, I turn the
ECHO off so as to help get around those flaky old C-64 bugs when the echo starts
to muddle up what you are sending.
Remember you can exit EVERYWHERE with a CTRL Z, a CTRL X will delete a line and
a CTRL R will REsend a line to you for verification.
End of the Tips for the Day...!
deb!
HINTS>(SCAN, READ, POST, DELETE, EDIT or EXIT):
1 *FIRST HINTS*
* Looking for Help? *
You've found the place! Archived here in what we hope
*u020 000 possible data loss, pad
*OUTPUT OFF*
HINTS>(SCAN, READ, POST, DELETE, EDIT or EXIT):
HINTS>(SCAN, READ, POST, DELETE, EDIT or EXIT):

